


We often take it for granted when we turn on the tap and get a glass of water, but there's a silent hero behind that clean sip: our water purifiers. Like that beloved old car in the garage or the sturdy bicycle you might have ridden for years, water purifiers thrive on a bit of love and care.
Let’s examine why regular check-ups and the occasional fix-up are crucial for keeping these gadgets working smoothly and ensuring we never miss that fresh taste every time we pour ourselves a glass.
Water Purifiers: Common Issues and How To Address Them
Issue # 1: Water Purifier Machine Not Working or Powering On
What to do:
The Sneaky Power Cord: Start with the basics. Is the power cord plugged in snugly? Give it a good look, ensuring it hasn't picked up any nicks or damages. Sometimes, it's the simple things.
The Mysterious Power Switch: Now, head over to that on/off switch. It could be having an off day. We must dig deeper if it's steadfastly pointing to 'on' and still giving you the silent treatment. It might be time to pull out your owner's manual, try other tricks, or shout to those handy professionals if you cannot solve it alone.
Issue # 2: Reduced Flow or No Water from Water Purifier Dispenser
What to do:
The Overworked Filter: Filters are the unsung heroes, catching all those tiny impurities so you don’t have to. But imagine seeing all those particles day in and day out. Exhausting, right? If your water dribbles out, your filter might shout, "I'm full!" A good clean or, in some cases, a complete replacement should get things flowing smoothly again.(Check filter
The Shy Input Valve: Then there's that sneaky valve connecting the primary water source to your purifier. Sometimes, it likes to play hide and seek, not fully opening up. Give it a gentle nudge, ensuring it's fully open, and watch as your water comes gushing back to life.
Issue # 3: Water Leaking from the Water Purifier Faucet
What to do:
Tighten Connections: Sometimes, the cause can be as simple as a loose connection. Tighten all fittings and connectors.
Check the Faucet: The water purifier faucet might need to be repaired or properly sealed. You might need to replace or reseal it.
Issue # 4: Unusual Taste or Odour in the Purified Water
What to do:
Filter Replacement: A worn-out water purifier filter can be the culprit. Check the filter’s lifespan and replace it if necessary. (Note: Check the Filter Replacement Guide section below for more details on this..)
Sanitise the System: Over time, the inside of the machine can develop mold or bacterial growth, impacting the taste and safety of the water. Consider sanitising the entire system or seeking professional help.
Issue # 5: Water Purifier Tablet Issues
What to do:
Dissolution Problems: If the water purifier tablet isn’t dissolving, ensure the water temperature is within the recommended range.
Storage: Store tablets in a cool, dry place. Exposure to moisture or extreme temperatures can affect their efficacy.
Issue # 5: Noisy Water Purifier Machine
What to do:
Air Traps: Sometimes, air gets trapped inside, causing a gurgling noise. Run the machine for a few cycles to see if the noise subsides.
Check Motor: If the noise persists, the motor or pump might malfunction. Consider consulting a technician.
Issue # 6: Poor Dispensing from Water Purifier Dispenser
What to do:
Clean Dispenser Nozzles: Over time, dispenser nozzles can get clogged. A gentle cleaning can restore proper flow.
Examine Pressure: If your system relies on pressure, ensure it's at the recommended level.
Maintenance Tips:
1. Regular Filter Replacement
Replace filters at recommended intervals depending on the usage and water quality to ensure optimal performance.
2. Clean Storage Tank
Empty and clean the storage tank every 2-3 months to prevent bacterial growth.
3. Check UV Lamp
If your cleaner uses UV technology, ensure the UV lamp is functional and replace it yearly or as the manufacturer suggests.
4. Inspect External Parts
Regularly check faucets, valves, and other external components for wear and tear. Replace if necessary.
5. Regular Flushing
Regularly clean the membranes and remove any built-up impurities if your purifier has a flushing system.
6. Avoid Direct Sunlight
Place the purifier in a cool, shaded place. Direct sunlight can promote algae growth and affect UV effectiveness.
7. Monitor TDS Levels
Check the TDS (Total Dissolved Solids) levels of purified water regularly. If classes are high, it might be time to replace membranes or filters.
8. Keep the Exterior Clean
Wipe down the external surfaces of the purifier with a damp cloth to prevent dust accumulation.
9. Avoid Running Without Water
Ensure there's always sufficient water input. Running the purifier without water can damage the motor.
10. Annual Servicing
Even if everything seems fine, having a professional service your purifier at least once a year is a good idea.
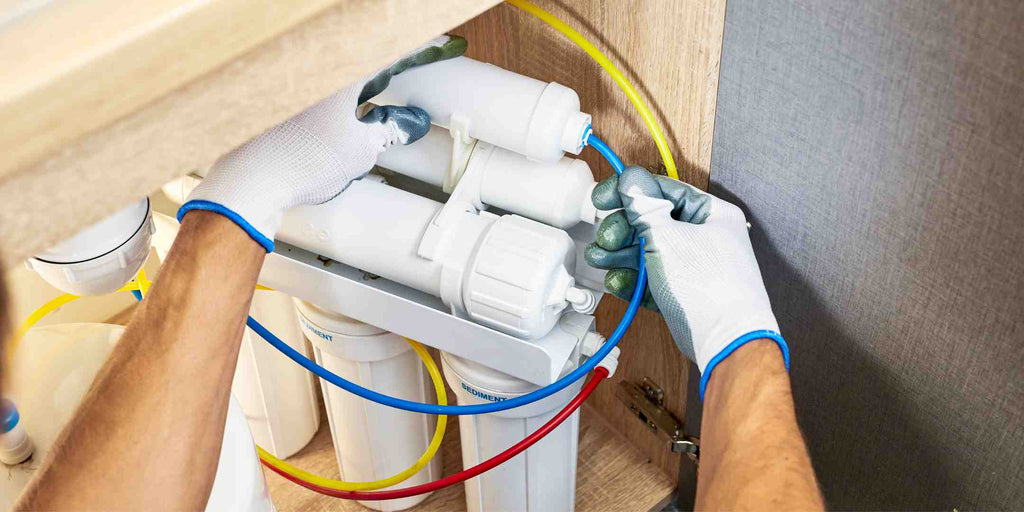
A Simple Guide to Water Purifier Filter Replacement
1. Preparation
Turn Off the System: Ensure that the purifier system is switched off, and if it's connected to an electrical source, unplug it.
Shut Off the Water Supply: Close the water valve that feeds the purifier.
2. Open the Filter Housing
Release Pressure: If your purifier has a pressure release button, press it to release any built-up pressure inside the system.
Unscrew the Housing: Using a filter wrench or by hand (depending on the model), unscrew the filter housing. It might be filled with water, so keep a bucket or towels handy for any spillage.
3. Remove the Old Filter
Pull Out the Filter: Carefully remove the old filter from the housing.
Clean the Housing: Rinse and wipe the inside of the filter housing to remove any debris or build-up. Some people also use a mild detergent for a thorough clean, but ensure you rinse it well afterwards.
4. Insert the New Filter
Check Orientation: Some filters have a specific top and bottom. Ensure you're placing it in the correct orientation.
Slide In: Place the new filter into the housing. It should fit snugly.
5. Reassemble the Housing
Screw Back: Reattach the filter housing to the system. Ensure it's tight, but be careful not to over-tighten as this can damage the threads or seals.
6. Turn On the System
Open the Water Supply: Turn on the water valve feeding the purifier.
Check for Leaks: Once the water supply is restored, check for any leaks around the housing. Turn off the water supply and ensure the accommodation is correctly sealed if you notice any.
Flush the System: Run the purifier for about 5-10 minutes (or as suggested by the manufacturer) to flush out any impurities or residues from the new filter.
7. Dispose of the Old Filter
Check with local regulations on how to dispose of water filters, as some areas might have specific disposal guidelines.
Key Takeaway:
Like any other essential appliance, regular checks and timely maintenance are crucial to keeping your water purifiers running at their best. Sure, a little DIY can solve a lot of hiccups, but always remember: when in doubt, it's okay to reach out. Your user manual is your go-to for specifics, and professionals are just a call away, equipped to handle any technical challenges.
While you're at it, why not elevate your whole water-purifying experience? Check out Megafurniture’s latest accessories - a sleek new faucet or an efficient dispenser could upgrade your kitchen needs.
Additional Readings:
Interior Design Singapore: Best Firms for Your Next Home Renovation
Your Ultimate Cheat Sheet to Renovation in Singapore: HDB Guidelines, Procedures & Tips
Bonus Treat: How to Sanitise Storage Tanks of Your Water Purifier
Note: Ensure that the storage tank of your water purifier is sanitised quarterly.
- Empty the storage tank.
- Fill with a mild bleach solution (a teaspoon of bleach for every gallon of water) or use a purifier-specific sanitising solution.
- Let it sit for 20 minutes, then drain.
- Refill the tank with clean water and run the system for a few minutes to flush out any residual cleaning agent.