


Renovation just completed, and the kitchen is finally doing real work. The first smoky roast, bubbling tray bake, or reheated leftovers can leave grease on the glass, crumbs on the floor, and stains that get harder each time the oven heats up.
Quick answer: To clean oven mess safely, turn the oven off, let it cool, remove the racks, loosen grease with baking soda paste or a mild cleaner, wipe with a damp cloth, then dry every surface before using it again. Clean fresh spills after use and deep clean every 3 to 6 months, or sooner if you bake, roast, or grill often.
What Type of Oven Will You Clean?

Start with the oven type. A built-in baking oven, countertop oven, convection oven, and microwave oven do not always clean the same way. Before using any cleaner, check the manual for parts that should not touch water, paste, or spray.
The safest habit is simple: use the gentlest method that can remove the mess. Heavy chemicals have their place, but they should not be your first move for everyday stains.
Self-Cleaning Ovens
Some modern ovens have a self-cleaning cycle. Pyrolytic models use very high heat to turn residue into ash, while steam-cleaning models use moisture to loosen lighter grime. Use the setting only as the manual recommends, remove loose crumbs first, and keep the kitchen ventilated because strong heat can create odour.
Non-Self-Cleaning Ovens

Traditional ovens need manual cleaning. This means removing the racks, softening grease, wiping the interior, and drying the appliance properly before the next use. Manual cleaning takes more effort, but it also gives you better control around heating elements, seals, knobs, and coated surfaces.
What to Prepare Before You Clean an Oven

Good oven cleaning starts before the scrubbing. Prepare the right tools so you do not damage the interior coating, glass, or controls.
- Baking soda for a gentle cleaning paste
- White vinegar in a spray bottle for final residue loosening
- Mild dishwashing liquid for racks and exterior surfaces
- Non-abrasive sponge or soft cloth
- Plastic scraper for stubborn spots
- Microfibre cloth for the glass door
- Paper towels or old newspaper for drying
Avoid steel wool, harsh scouring pads, and strong cleaners unless your oven manual says they are safe. Scratches inside the oven can make future grime cling faster.
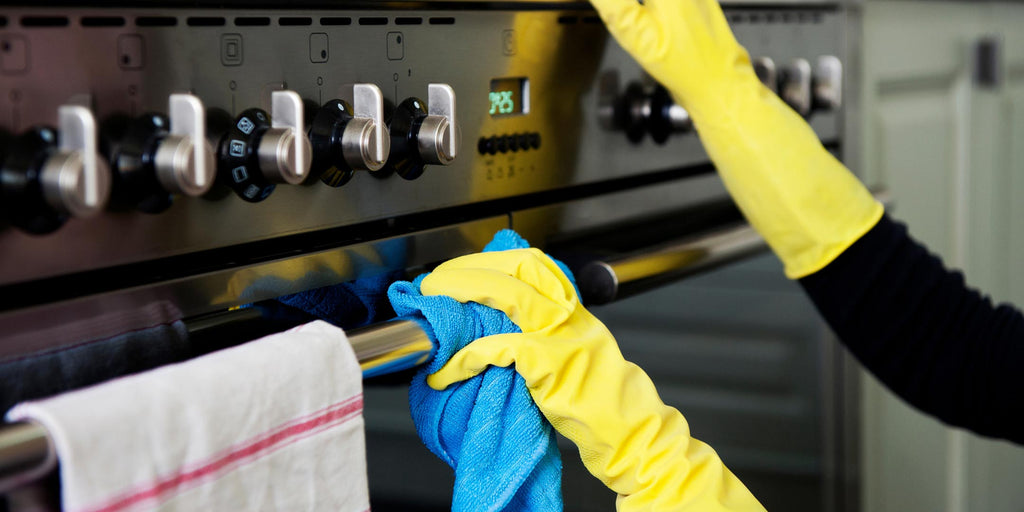
Prepare Your Oven

Turn the oven off, unplug it if possible, and let it cool fully. Remove trays, pans, loose foil, crumbs, and racks. Wipe loose food bits first, because wet crumbs turn into paste and make the job messier.
Be careful around heating elements, vents, rubber seals, and control knobs. These areas should stay as dry as possible.
How Often Should You Clean Your Oven?

Wipe fresh spills once the oven cools. This small habit prevents smoke, odour, and sticky residue during the next cook. If sauce, cheese, oil, or sugar spills onto the oven floor, clean it before using the oven again.
Deep cleaning every 3 to 6 months works for most homes. Heavy bakers, frequent roasters, and households that grill meat often should clean more often. The bottom of the oven deserves the most attention because it takes the spills that keep baking into hard stains. Leaving those stains there is not “seasoning”. It is just tomorrow’s smoke problem.
How to Clean Oven at Home

For a non-self-cleaning oven, follow this simple order:
- Remove the racks and soak them separately.
- Brush or wipe out loose crumbs.
- Spread baking soda paste on greasy interior areas, avoiding heating elements and vents.
- Let the paste sit for at least 30 minutes, or longer for thick residue.
- Wipe with a damp cloth.
- Spray a little vinegar on leftover baking soda residue, then wipe again.
- Dry the interior before replacing the racks.
Chemical oven cleaners can work faster on burnt grease, but they are not ideal for every appliance or every household. If you have young children, pets, or poor kitchen ventilation, start with the gentler method and move up only when needed.
Clean the Oven Racks
Soak the racks in warm water with mild dishwashing liquid. For greasy areas, sprinkle baking soda over the rack, scrub with a non-abrasive sponge, then rinse well. Use vinegar only after the baking soda has done its work, mainly to help remove remaining residue.
Dry the racks fully before putting them back. Wet racks can leave watermarks and may affect smooth sliding.
How to Clean the Bottom of the Oven

The oven bottom usually needs the most time. Spread baking soda paste over stained areas and let it sit for at least an hour if the residue is thick. Use a plastic scraper for softened grime, then wipe with a damp cloth.
Do not pour water directly into the oven base unless the manual allows it. Keep cleaning paste away from exposed heating elements, vents, and openings. Regular cleaning matters here because repeated heat turns soft spills into hard, smoky patches.
Clean the Oven Door and Exterior

Clean the glass door with a microfibre cloth and mild soap solution. For stuck grease, place baking soda paste on the glass, wait a few minutes, then wipe gently. Avoid scraping glass with sharp metal tools.
For enamel finishes, mild soap and a soft sponge are usually enough. For stainless steel, wipe with the grain and dry the surface to reduce fingerprints and watermarks. Clean knobs with a slightly damp cloth instead of soaking them with detergent.
Keep Your Oven Easier to Maintain
Use trays or oven-safe liners only if your oven manual allows them. Place dishes on the right rack height to reduce spills, and wipe splatters once the appliance cools. Good cooking habits cut cleaning time more than any special cleaner.
Local support also matters when choosing a new appliance. For ovens for Singapore kitchens and microwave ovens, delivery, installation guidance, and after-sales help are practical concerns, especially when the appliance needs proper placement, ventilation, or service support.
Frequently Asked Questions
What is the best way to clean oven grease without harsh chemicals?
The best gentle method is baking soda paste. Spread it over greasy areas, let it sit, then wipe with a damp cloth. Use a little vinegar at the end to loosen leftover baking soda residue.
Can I clean my oven while it is still warm?
No. Let the oven cool before cleaning. Hot surfaces can burn your hands, dry cleaners too quickly, and make glass or coated surfaces more sensitive to damage.
How often should I deep clean my oven?
Most homes can deep clean every 3 to 6 months. Clean sooner if the oven smokes, smells greasy, or has visible food residue on the bottom.
Can I use the same cleaning method for a microwave oven?
No. A microwave oven needs a gentler method. Use a damp cloth, mild soap, or steam from a bowl of water if the manual allows it. Avoid abrasive pads and heavy oven cleaner inside a microwave.
Should I replace my oven if it keeps smoking after cleaning?
Not right away. Check for hidden food bits, grease near heating areas, and residue left from cleaning products. If the smoke continues after careful cleaning, arrange service support or consider a new oven if the appliance is already old or unreliable.
Every order ships locally, and after-sales support is handled from Singapore. Complimentary delivery and professional installation are available on qualifying orders. The team is reachable at +65 6950-2657, Monday to Friday, 9am to 6pm.